TricksWorld 99: windows xp

Tab

How To Chat With Friends Through Command Prompt[MS-DOS]

How To Chat With Friends Through Command Prompt[MS-DOS]


Hello Friends,
Chatting Which is common thing nowadays,most of you chat with your friends through Facebook,Gmail,SMS,Whats APP etc..
But this is Something Different i mean to say is that you can chat with your friends through Command Prompt [MS-DOS].
All you need is just your friends IP address. You can get your Friends Ip address by telling him to visit this website whatismyipaddress.com

Steps To be Followed:
  • Get your Friends Ip Address. 
  • Open your Notepad and copy the below code & paste it as it is in notepad. 
@echo off
:A
Cls
echo MESSENGER
set /p n=User:
set /p m=Message:
net send %n% %m%
Pause
Goto A


  • Now save the notepad file as "Messenger.Bat".
  • Open Command Prompt [Press winkey + R and type cmd] 
  • Drag the above created file (.bat file) over to Command Prompt and just press 
        Enter.
How To Chat With Friends Through Command Prompt[MS-DOS]
  • Now type the IP Address of the your friends computer and press enter.

How To Chat With Friends Through Command Prompt[MS-DOS]

  • Now just type your message and press enter.
                      How To Chat With Friends Through Command Prompt[MS-DOS]
Chat with your friends in a new way and enjoy!!!

Enhanced by Zemanta

How To Create the Impossible "CON" "AUX" "NUL" Folders/ Folder without name


How To Create the Impossible "CON" "AUX" "NUL" Folders/ Folder without name

Hello everyone,
Most of you know this impossible thing in windows that is, you cannot create a folder called as CON or AUX or NUL in windows.Just try once
Create a new folder> rename it has CON> Finally you wont succeed :)

Here is a simple trick,theres no use from this post i just wanted to share this article so that everyone will come to know that there is also a way to create the folder called CON/AUX/NUL.

Follow these Simple Steps:
  • Right click on the desktop screen and create a new folder
                         How To Create the Impossible "CON" "AUX" "NUL" Folders/ Folder without name
  • After creating the new folder right click on the new folder and click on rename
                                     
How To Create the Impossible "CON" "AUX" "NUL" Folders/ Folder without name
  • Now do this carefully  Press ALT + 255 (type 255 one after the other ) (type the numbers located on the num pad - right side of keyboard)
  • Leave the ALT button and now you will get the folder as shown below
                                             How To Create the Impossible "CON" "AUX" "NUL" Folders/ Folder without name
  • Type CON/AUX/NUL  or just leave it blank
                        How To Create the Impossible "CON" "AUX" "NUL" Folders/ Folder without name How To Create the Impossible "CON" "AUX" "NUL" Folders/ Folder without name      
So now you have suceeded in creating the folder with name as Con / Aux / Nul and even a folder without name.
Enjoy !!!!!!!!!  

How to Fix USB Device Not Recognized in Windows


How to Fix USB Device Not Recognized in Windows
Hi Everyone,
In this Post am going to explain how to get rid of the usb device not recognised error.
 Most of you will be getting this error whenever you try to plugin a Pendrive,USB mouse,External devices,USB keyboard.
Even i Faced the same problem 3 days back and got it rectified so i wanted to convert my problem and the solution that i got it to a Article which i have presented here!!!!! 
I thought that there is a problem with the port so check it out i connected my mobile but the mobile was charging and there was no problem with the port.
How to Fix USB Device Not Recognized in Windows

So i reinstalled all my drivers i thought it would fix my problem but it didnt. I was frustrated.
I Searched many articles online and found a solution to this frustrating error.

  • When you get these kind of error just go to  Device Manager and you can see that the device is shown as an Unknown Device as i have shown below.
How to Fix USB Device Not Recognized in Windows


  • You may laugh at this solution :D :D because there is no involvement of drivers,installation etc.
  • The simple awsome solution is Just UNPLUG YOUR COMPUTER/PC FROM THE POWER SUPPLY
Note: This doesnt mean just turning off your PC because modern PC's doesnt really turn off when you press the power button because the still motherboard gets power to it.
  • Didnt Understand still??? 
Motherboard is the place where all the hardware of the Pc is connected to it even the  USB ports.Most of the times the motherboard should be rebooted because all your USB ports suddenly stops working. 
The microprocessor located on the motherboard will reload the drivers.
So this will bring your usb ports to normal condition.
All you need to do is:
  • Just turn off your PC with the Shut Down option or just by pressing the power button
  • UNPLUG the connection from the wall outlet. 
  • After 2-3 mins just plug it back.
I got it fixed like this!!!Hope this works for you too!!!!!!!!!!
Also Read:
Enhanced by Zemanta

How To Delete Files From Recent Files List In Windows Media Player

How To Delete Files From Recent Files List In Windows Media Player
Hello Everyone,
There are several applications that remembers your recently opened files.
Windows Media Player has this feature.This is useful only if you play certain files regularly , but some of  you may want to clear the list if you share the computer and a user account or sometimes you may create archives and CD'S.

Steps To be followed to clear the list:

  • Start>run 
  • Now type regedit and press enter
  • Go To HKEY_CURRENT_USER|Software|Microsoft|MediaPlayer|Player|RecentFileList 
  • Now Delete the RecentFileList subkey. 
  • And if you have Streamed Content From Internet you can delete the RecentURLList subkey 
  • Restart the computer .

If You need to keep certain files in the list ,Please don't delete the entire key Instead Delete the individual entries within the key.
Enjoy!!!

Also Read:

How to Format USB Drives to delete Viruses Permanently

How to Format USB Drives to delete Viruses Permanently

Hello Everyone,

You will be frustrated of viruses which almost corrupts your files. But you people will be using antivirus to scan the most harmful viruses and remove them.
But you know what????
When you transfer data through USB/PenDrives it may contain viruses and you will be able to format the USB drive but some of the viruses do remain in drive even though you format it.
So here I will give you a solution which removes virus permanently from your pen drive.


Also Read:Top 5 Softwares To Recover Corrupted/Damaged Files


Steps To Be Followed:

  • Plugin the Pendrive which needs to be formatted
  • Now Just Find the drive letter of  the inserted pen drive
How to Format USB Drives to delete Viruses Permanently

  •  Click on Start Button and Then click on Run
How to Format USB Drives to delete Viruses Permanently

  • In the Run Prompt Type cmd and then Hit Enter
  • You can see a command Prompt Appeared and In this window Type just as shown below
                               format "Pen drive Letter:"
                    ex: if your pendrive letter is K then type  Format k:


How to Format USB Drives to delete Viruses Permanently
  • Hit the  Enter button twice and now the cmd prompt will verify the pendrive file system
  • And Now the command prompt will ask to enter drive name(Pendrive name) just type your own name and HIT enter
  Now Your Pendrive Is Completely Formatted :)
Enhanced by Zemanta

How To Remove Recycle Bin From Computer/Laptop

How To Remove Recycle Bin From Your Computer

Hello everyone,

This Trick is something special.Some of you dont want to delete your recycle bin in your Pc.

So follow these steps:

  • Press windows key + R(run)  and then type without inverted commas "regedit"
  • HKEY_LOCAL_MACHINE\SOFTWARE\Microsoft\Windows\CurrentVersion\Explorer\Desktop\NameSpace
     
  • You will see{ 645ff-040-5081-101B-9F08-00AA002F954E} delete this key so now your recyle bin is deleted  from your desktop.

How To Trasform Windows Xp To Macintosh[FlyakiteOSX]

How To Trasform Windows Xp To Macintosh[FlyakiteOSX]
 FlyakiteOSX is a straightforward windows XP to macintosh transform pack which will manipulate your XP interface into macintosh OSX however still maintaining a similar Windows productivity. therefore currently your appearance are going to be amazing and your working are going to be smart too.

FlyakiteOSX[Win xp to Macintosh] transformation pack will automatically replaces the system files, icons, registry entries and install\'s third party software's, cursors etc.

Now if in any case you\'re not pleased with the skin pack applied you\'ll be able to simply remove the complete skin pack by uninstalling it from the Add/Remove choice in control panel. If you would like to access the registry entry for FlyakiteOSX navigate to :
HKEY_LOCAL_MACHINE\Software\FlyakiteOSX

and than you'll be able to edit something you needed too.

Well you'll be able to download FlyakiteOSX for free of charge using softonic link however this may install a bit software package on your system so after than your downloading will begin.

                         Also Read:YouTube Tricks
 

How To Hide Hard Drive Partitions In Windows

How To Hide Hard Drive Partitions In Windows

Hello Guys Everyone know How to Hide the Folders,but in this Trick its Something Different,i will teach u How to Hide The Harddrive Partitions Itself
The Steps To be Followed:
  • Goto Start > Run and type diskpart 
A DOS window will appear as shown Below
How To Hide Hard Drive Partitions In Windows

  •  Then type list volume

All partitions will be listed, there will be also a volume number for each partitions as show below
How To Hide Hard Drive Partitions In Windows


Lets Assume That You Want to Hide  drive H:, type select volume 2 (In this example, 2 is the volume number of H:).
It Differs From System To System, Now You Will Get A message That "Volume 2 is the selected volume".

Finally  type remove letter H . You may have to reboot the computer. Diskpart will remove the Letter H. Here We Are Not Actually Hiding But  Windows XP doesn't have the capability to identify the unknown volume, it won't display or show results from it. To access the content of the hidden drive, repeat the steps, but 

replace remove to assign, that is assign letter E.


                      Also Read : Google Tricks


How to Close All Opened Applications With Just One Click

How to Close All Opened Applications With Just One Click

Hello everyone, When you open Too many Applications you will be Frustrated of closing them one by one.  Install Close All Windows on your computer for easy access.

How To Get Started?
  • Download the application from the link Given below
  • After the file is downloaded extract the CloseAll folder to a permanent Linklocation on your computer
  • Since Close All Windows is an application extract to the folder to C:\Program Files\ where applications are typically installed.
  • For easy access it is best to pin the application to the taskbar. Drag the Close All Windows application from the CloseAll folder onto the taskbar.

                                                     For Funny Tricks: Click Here

How To Install Windows Xp in 10minutes


We all know that, after loading the file or copying the file from the boot disk for system temporary space requires a reboot first.

Now if we press Shift + F10, then Task Manager opens and we discover that a process running called setup.exe

Now our task is to make the priority of this process by right-clicking MAXM.

We did.

Find ur XP installed in 10 minutes with a tolerance of 2 minutes.

Free Beautiful Themes For windows XP

Hiiii Guys,
Do you know what I hate most about Windows XP? It's look. It's painful combination of blue and green. So one of the first thing I do after every Windows install is patch the Uxtheme file so that I can apply a visual style of my choice.
The following is a list of some of the choicest visual styles that can give Windows XP a total makeover. Pick any!
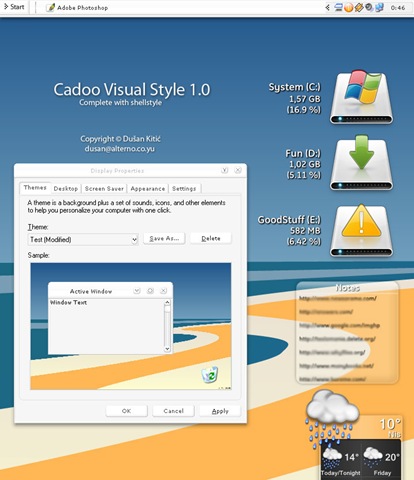
Note: This list contains only shell styles that can be applied directly by patching Uxtheme or throughStyleXP. No Window Blinds skins here.I have given the installation Instructions at the Bottom.

Watercolor Arrow - This theme looks so cool with a light colored taskbar, blue menu and funny hand-drawn type icons.
Watercolor_Arrow_by_pigmonkey2
download_button

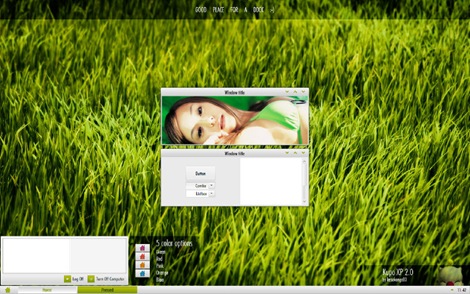
Kupo XP 2.0 - A very minimalistic design available in 5 colors.
Kupo_XP_2_0_by_lassekongo83
 download_button

Luder
 -  Another minimalistic theme with a clean green look.
Luder_for_XP_by_lassekongo83
 download_button

Aurum VS 1.1
 - A bit of Vista's Aurora look.
Aurum_VS_1_1_by_GeorgeHarrison
 download_button

Delta VS
 - A silver gray theme with mild colors.
Delta_VS_by_OmART
 download_button

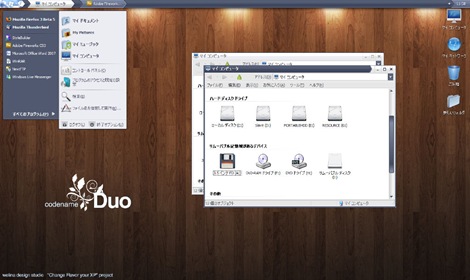
DUO
 - A mixture of Vista and Mac.
DUO_by_GensouRay
  download_button

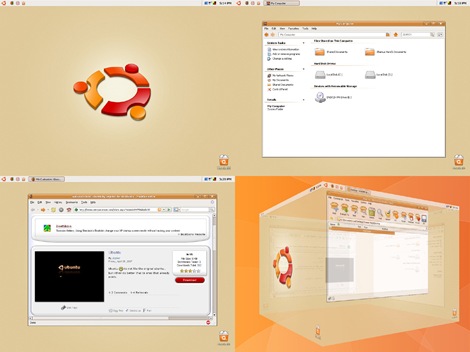
Ubuntu XP
 - This is the closest Windows XP can get to Ubuntu! Brilliantly done.
Ubuntu_XP_by_ShamusHand
  download_button


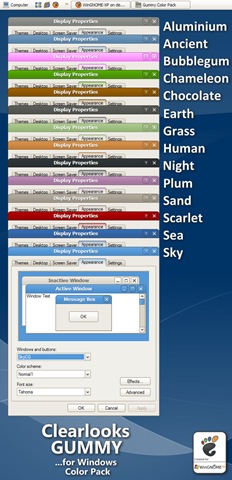
Clearlooks Gummy
 - This theme pack gives a "Gnome" look to Windows XP. Available in 14 different colors!
Clearlooks_Gummy___Colors_by_WinGNOME_XP
  download_button

Cadoo Visual Style 1.0 - A smooth whitish theme that gives a great contrast to any icon set.
Cadoo_Visual_Style_1_0_by_icube001
  download_button

animus -  A Mac like blue and white theme that works great with Mac icon set.
animus_by_chiwou
download_button

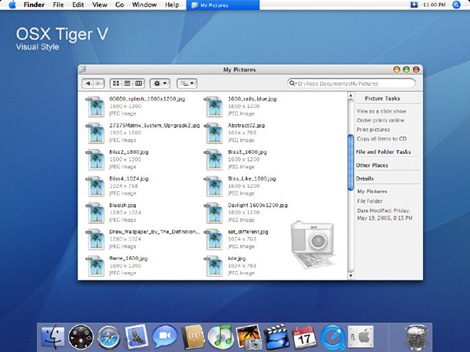
OSX Tiger V
 - Give Windows the Mac look. Very nicely done.
OSX_Tiger_V_visual_style_by_dobee
download_button

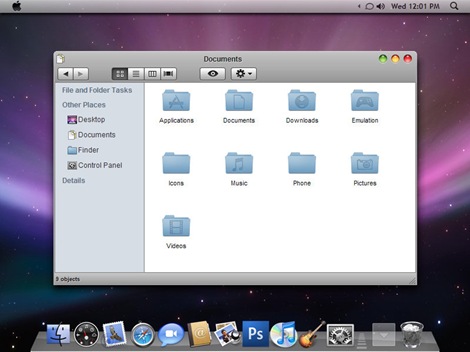
Leopard X
 - Another Mac theme with a slightly darker look.
Leopard_X_by_kspudw
download_button

VistaPerfection X4
 - One of the best looking Vista theme for Windows XP.
VistaPerfection_X4_Msstyles_by_kayeirene
download_button

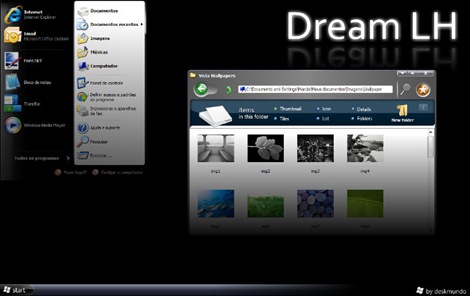
Dream LH 1.0
 - Another theme with the Vista look, but darkish and black  explorer window and task panel.
Dream_LH_1_0_by_deskmundo
download_button

EX2008 Visual Style
 - A darkish theme with a tinge of green. Very minimalistic.
EX2008_Visual_Style_by_alocal
download_button

SlanXP 2.0
 - Another dark theme for Windows XP.
SlanXP_2_0_by_lassekongo83
download_button

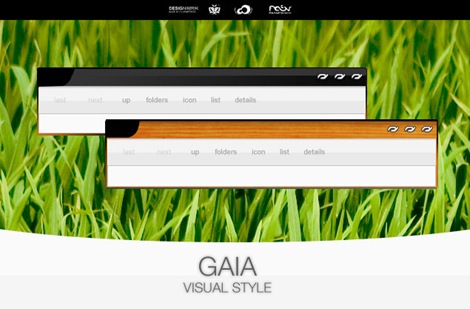
GAIA
 - A very simple yet elegant theme with mild colors.
GAIA_VS_by_novoo
download_button

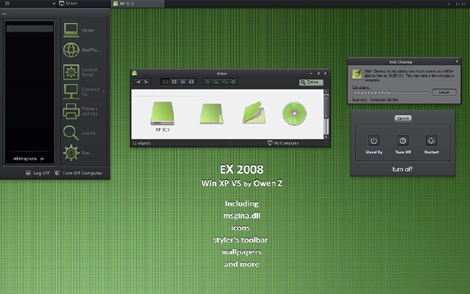
Greenius.VS
 - Another beautiful green theme. (Green seems to be the preferred color for designers)
Greenius_VS_for_GAIA_1_1_by_aMADme
download_button

This is how to install the themes:

1. Download and install Uxtheme patcher. During install a message will be displayed that important Windows file are being replaced and will ask you to insert the windows CD to fix it. Just ignore and click "continue"

2. Download the theme pack and copy the folder containing .msstyles and shellstyle.dll (this is inside another folder) to C:\WINDOWS\Resources\Themes\
3. After this is done, right-click on desktop and click Properties. Now click on the Appearance tab. UnderWindows and Buttons you will find the list of all the themes you installed. Select one from the list and click Apply.
Sometimes, the downloaded pack contains additional utilites like Styler and Rocketdock etc to bring other changes to Windows. It's up to you whether you want to install the additional stuff. You can visit the original page of the theme author for more instruction on how to use those.